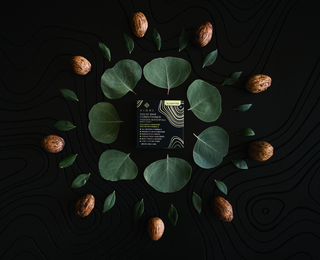
In a world that's increasingly conscious of environmental impact, DIY shampoo bars have emerged as a sustainable and effective alternative to traditional liquid shampoos. These compact, travel-friendly bars not only minimize plastic waste but also allow you to tailor ingredients to your hair's specific needs. Let's dive into the world of homemade hair care with this comprehensive guide.
The Basics of DIY Shampoo Bars
What You'll Need:
Gathering your ingredients is the first step to concocting your personalized shampoo bar. Most recipes call for a combination of:
Troubleshooting Tips:
Homemade shampoo bars are a sustainable, customizable, and cost-effective solution to traditional hair care. By understanding the process and tailoring ingredients to your hair's unique needs, you embark on a journey towards healthier locks and a greener planet.
Join the shampoo bar revolution today and discover the art of crafting your personalized hair care solution—one bar at a time. Your hair, and the planet, will thank you.
The Basics of DIY Shampoo Bars
What You'll Need:
Gathering your ingredients is the first step to concocting your personalized shampoo bar. Most recipes call for a combination of:
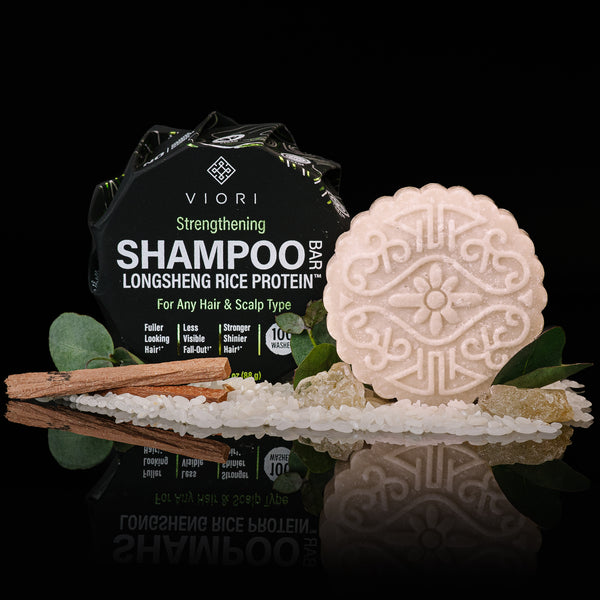
- Base Oils: Coconut, olive, and jojoba oils provide a nourishing foundation.
- Lye (Sodium Hydroxide): This ingredient, though intimidating, is crucial for saponification, the process that turns oils into soap.
- Essential Oils: Choose lavender, tea tree, or peppermint for their aromatic and therapeutic benefits.
- Additives: Consider incorporating ingredients like aloe vera, shea butter, or honey for extra moisturizing properties.
Safety First:
Before you begin, prioritize safety. Wear gloves and goggles, and mix lye in a well-ventilated area. Handling it with care is key to a successful and safe DIY shampoo bar project.
Crafting Your Shampoo Bar
Step-by-Step Guide:
Measuring and Mixing: Precision is essential. Accurately measure your oils, lye, and other ingredients using a kitchen scale. Slowly add lye to water (never the other way around) to avoid a dangerous reaction.
Customizing for Hair Types:
Before you begin, prioritize safety. Wear gloves and goggles, and mix lye in a well-ventilated area. Handling it with care is key to a successful and safe DIY shampoo bar project.
Crafting Your Shampoo Bar
Step-by-Step Guide:
Measuring and Mixing: Precision is essential. Accurately measure your oils, lye, and other ingredients using a kitchen scale. Slowly add lye to water (never the other way around) to avoid a dangerous reaction.
- Blending Oils: Combine your chosen base oils in a heat-resistant container. Heat them gently until fully melted, creating a homogeneous mixture.
- Adding Lye: Once both the oil and lye mixtures reach the same temperature, slowly add the lye to the oils. Stir continuously to avoid clumps.
- Saponification: This is where the magic happens. Your mixture will go through various stages before thickening. Patience is key; this process may take several hours.
- Adding Extras: Incorporate essential oils and any extra additives during the saponification process. Stir thoroughly to ensure an even distribution.
- Molding: Pour your shampoo bar mixture into silicone molds. This step allows for creative shapes and sizes.
- Curing: Patience is crucial during the curing phase. Let your bars sit in a cool, dry place for at least four weeks. This allows excess water to evaporate, resulting in a harder, longer-lasting bar.
Customizing for Hair Types:
- Dry Hair: Add avocado oil or shea butter for extra moisture.
- Oily Hair: Opt for lighter oils like jojoba or grapeseed and include a touch of astringent essential oils like tea tree or eucalyptus.
- Dandruff-prone Scalp: Tea tree oil is renowned for its antifungal properties. Consider incorporating it into your mix.
Troubleshooting Tips:
- Soft Bars: If your bars are too soft, they may need more curing time.
- Brittle Bars: On the other hand, if they are too brittle, reduce the curing time or adjust your oil proportions.
Homemade shampoo bars are a sustainable, customizable, and cost-effective solution to traditional hair care. By understanding the process and tailoring ingredients to your hair's unique needs, you embark on a journey towards healthier locks and a greener planet.
Join the shampoo bar revolution today and discover the art of crafting your personalized hair care solution—one bar at a time. Your hair, and the planet, will thank you.
NOT SURE WHICH PRODUCT IS RIGHT FOR YOU?
TAKE THE QUIZTakes 30 seconds · 134,000+ customers matched
WHAT CUSTOMERS ARE SAYING
Real reviews for Hidden Waterfall Barra de Champú


